Making Hearts with sTile
From a black background, like when sTile first starts, we'll make a simple heart shape. The basic steps are:
1. Create a heart shaped mask
a Set values, select options
b Draw a circle
c Move the image 1/2 the width of the window either left or right
e Apply the SineWave U/D effect
f Move the image 1/2 the width of the window either left or right
2. Make a multi-color gradient
a Choose colors and position
3. Make a circle using the multi-gradient
4. Repeat mask steps
a Move the image 1/2 the width of the window either left or right
b Apply the SineWave U/D effect
c Move the image 1/2 the width of the window either left or right
5. Apply the mask
At startup, sTile has a 512 x 512 pixel canvas. That will be the size for this demonstration.
1. Create a gray heart to use as a mask.
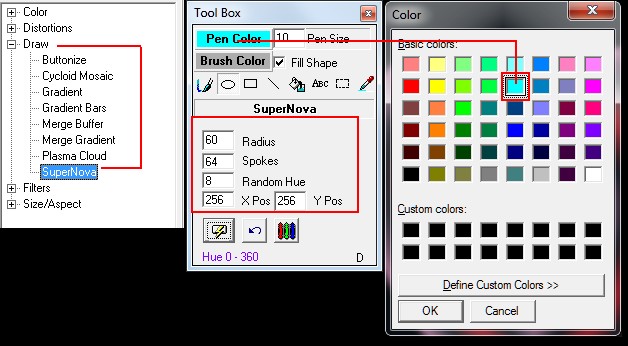
The smaller Tool Box window that floats around has the settings to use.
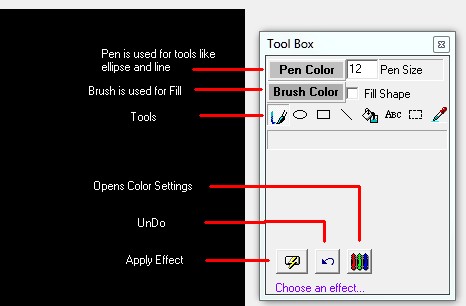
To change the pen color, click on the button that says Pen Color.
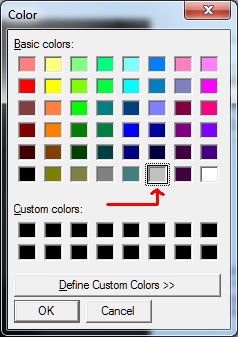
The button color reflects what you choose. I used this color from the dialog for the Pen:
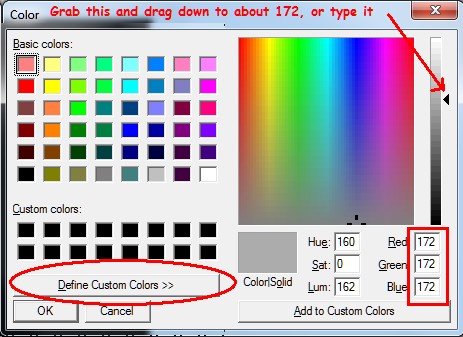
Change the Brush color by clicking the Brush Color button. I used a custom color from the Brush Color dialog:
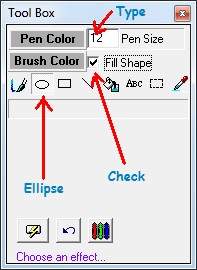
The Pen Size is changed by overtyping whatever's there. Click in the field and erase the contents, then type 12.
Check the Fill Shape option.
Click the Ellipse tool.
Also, there are a couple of options that must be set.

Position the mouse in the upper left corner of the canvas. The ellipse need not be a perfectly round circle, that will be changed in the next dialog. Draw an ellipse by pressing the left mouse button and holding it down while dragging towards the lower right corner of the canvas. At this point, you can release the mouse. While you're drawing the ellipse, you will see a white shape on the black background until you release the mouse.
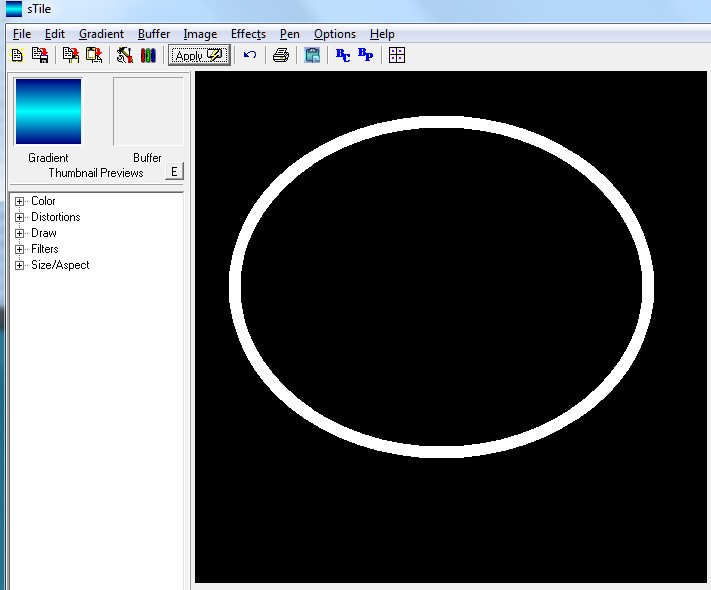
When you release the mouse, the ellipse snaps into a perfectly round circle and a new dialog pops up. Using the Width box, you can adjust the size of the circle. The other settings are changed automatically, to keep the circle centered on the canvas.
Change the circle Width to 352, type or use the arrows.
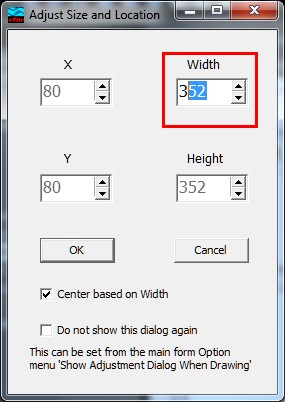
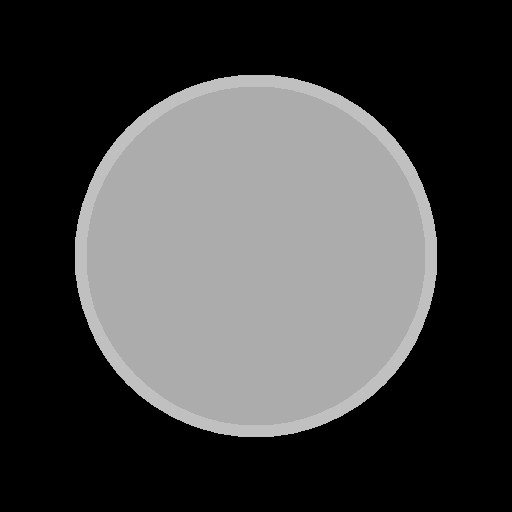
Click OK and you should have a gray circle.
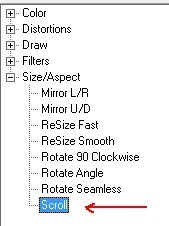
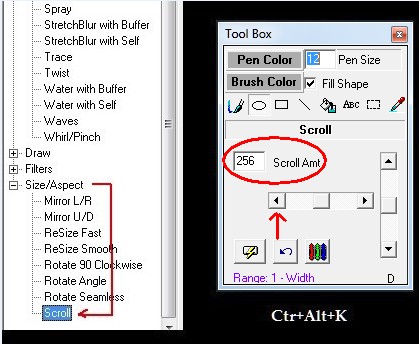
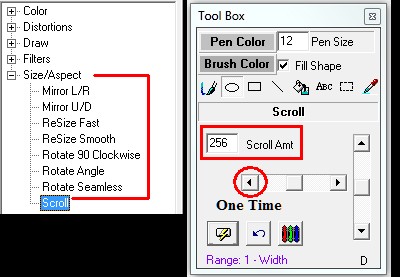
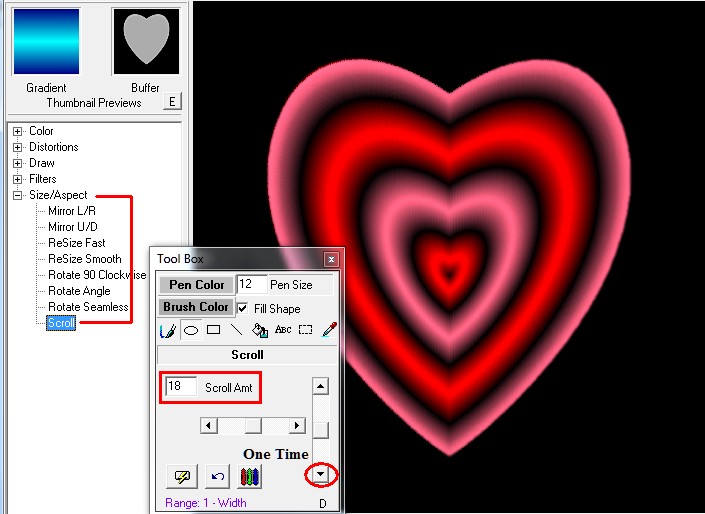
Next, the center of the canvas must be moved to one half of the width. The current width is 512 (you can see it in the bottom of the window in the status area) so by dividing 512 by 2 the canvas needs to move 256 pixels left (or right; it ends up being the same since sTile images are seamless). To move the canvas, the Scroll tool is used. It can be selected from the left-side treeview in the Size/Aspect section
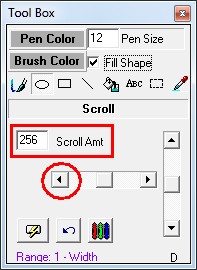
Now the toolbox shows two scroll bars and a box where you can change the scroll amount.
Change the scroll amount to 256 and then click the left or right arrow on the scrollbar one time to move the canvas.
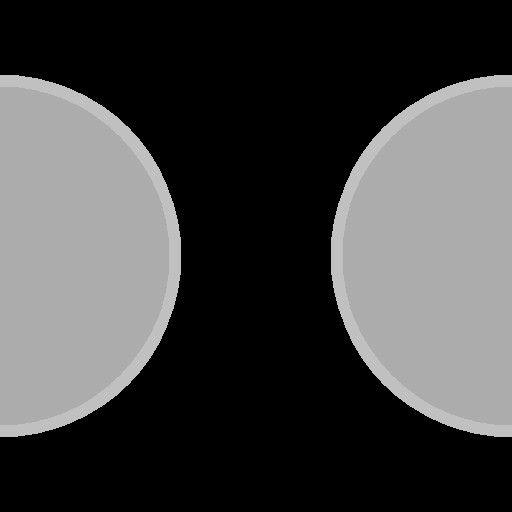
The circle is now split in half, so we see two semi-circles
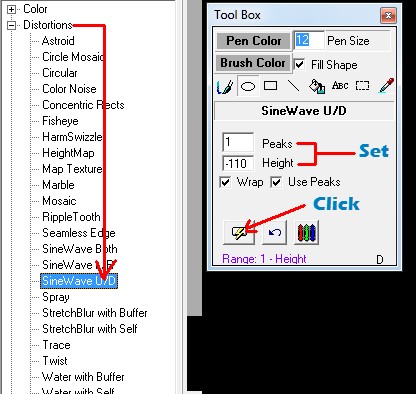
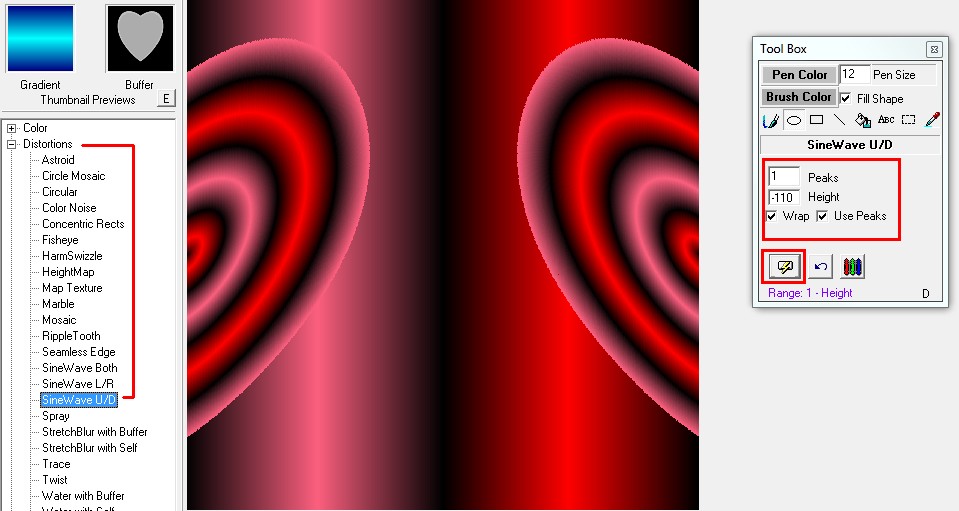
Next apply the SineWave U/D effect. From the effects treeview on the left, choose SineWave U/D from the Distortion section. The toolbox now shows the controls for the effect. Set the Peaks to 1, and set the Height to -110 (negative numbers are OK). Make sure the Wrap and Use Peaks boxes are checked. Then click on the Apply button (The lightning bolt thing).
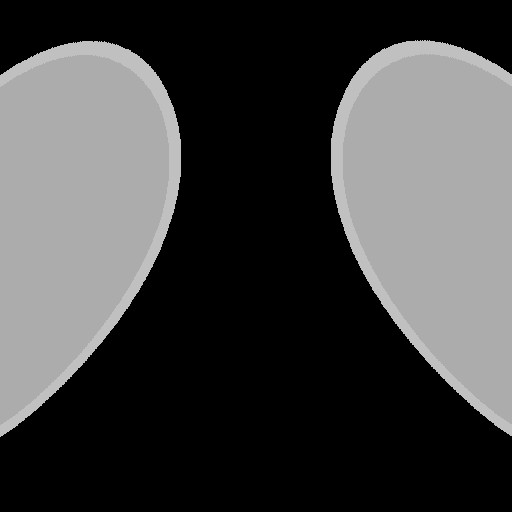
The semi-circles now have a hump on the top.
Scroll the image left or right 256 pixels to reposition the canvas. A shortcut for the scroll tool is Ctrl+Alt+K, or select it from the leftside treeview. Then, scroll left or right one time for 256 pixels.
The canvas is now showing a gray heart.
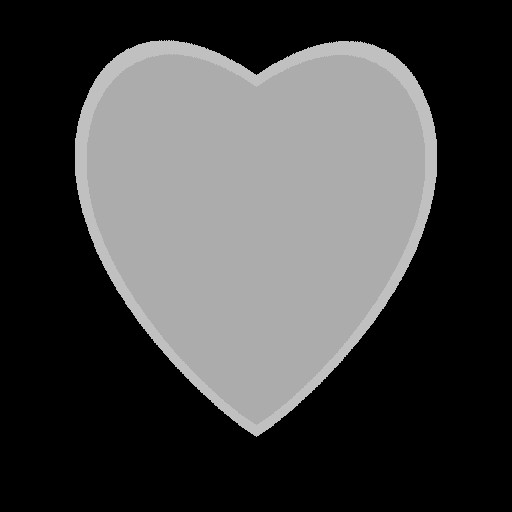
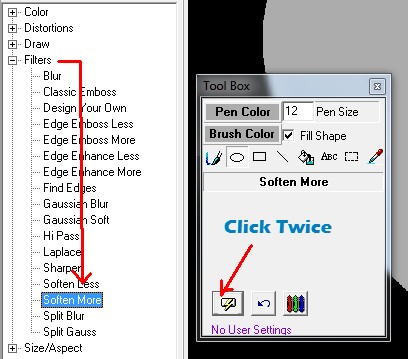
Soften the edges by selecting the Soften More effect from the Filters section, then click the Apply button two times.
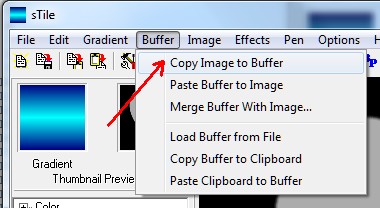
Copy the canvas to the Buffer. From the menu, choose Buffer > Copy Image to Buffer. The heart shows in the small preview area.
2. Create a Mutli-Gradient
From the menu, choose Gradient > Multi-Color...
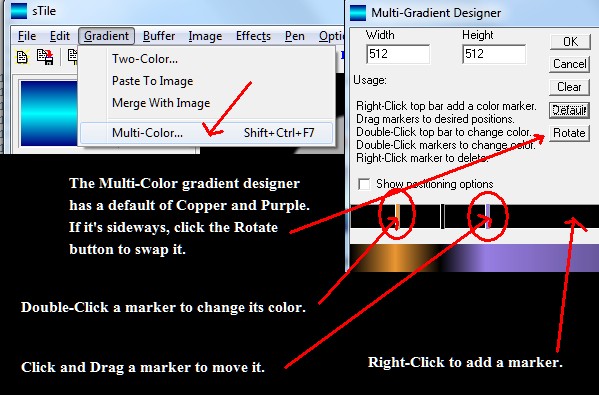
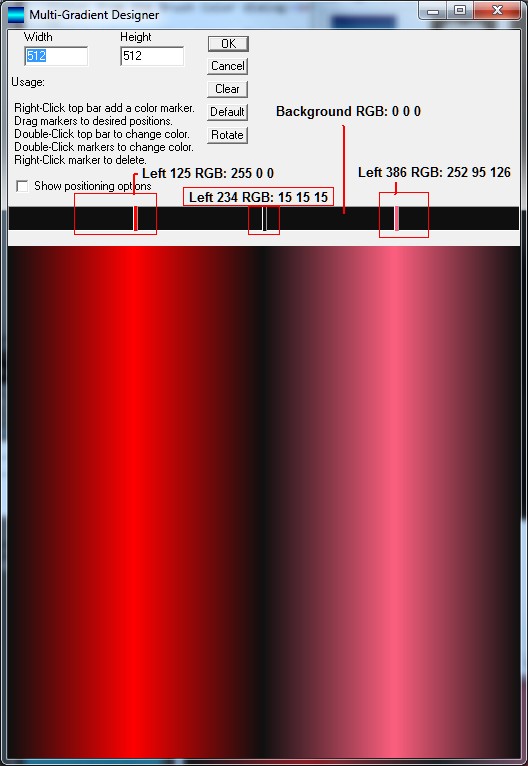
I changed the colors by double-clicking the markers, which opens a color selection dialog. I'll show the settings, but these don't have to be exact. We just want a couple of reddish bars separated by near-black. RGB correspond to the Red Green Blue custom color numbers in the Color Dialog. But if you get close it'll be good enough. Click OK when you're done.

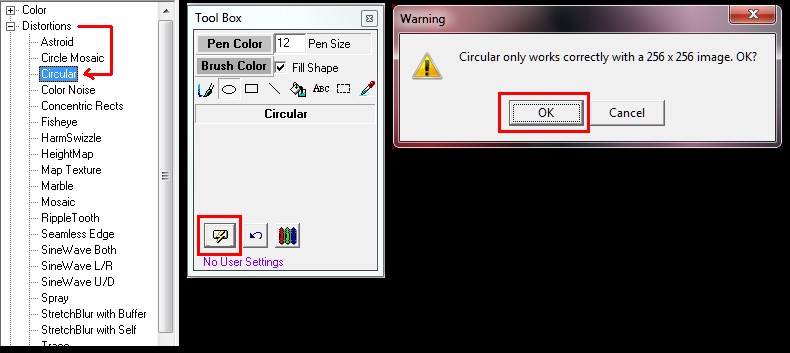
3. Make A Circle
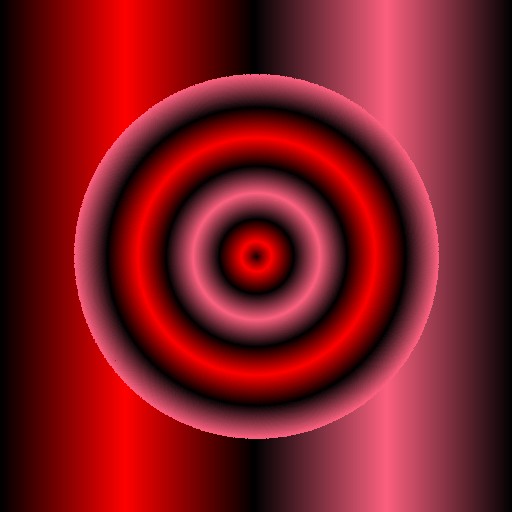
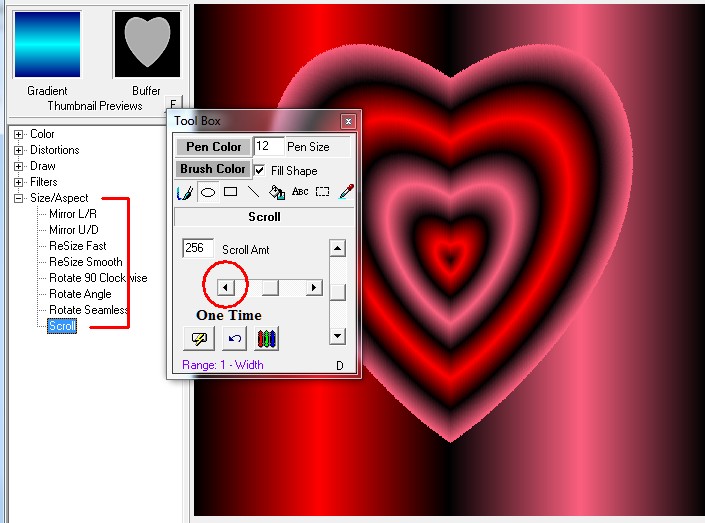
Apply the Circular effect. When warned about 256, click OK
You should have a picture that looks like this:
4. Repeat Mask Steps
Scroll left 256
SineWave U/D with the settings shown below (they should still be the same)
Scroll left 256 again to center the heart shape
5. Apply the Mask
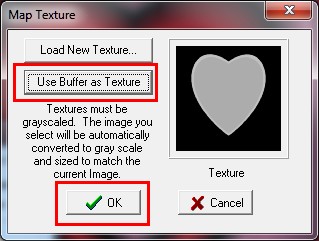
Apply the mask to just leave the heart shape on a black background. Use the Map Texture effect to apply the mask. Set the brightness to 18 and Apply. You'll get a prompt.
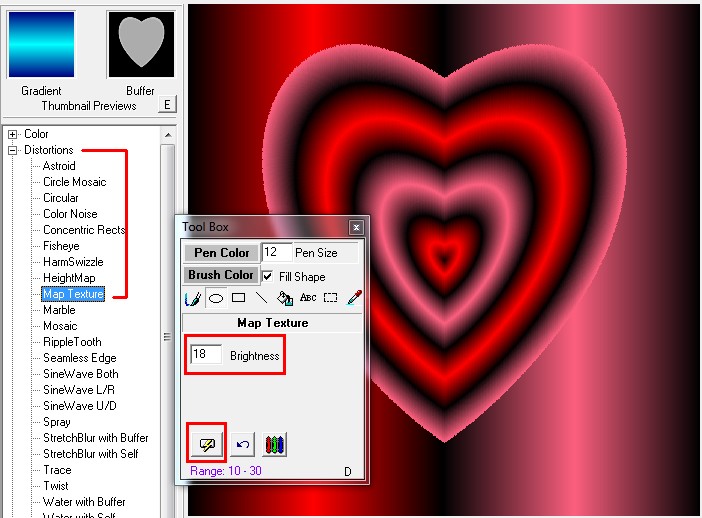
If the texture preview showing the gray heart is not visible, click on Use Buffer as Texture button, and then click OK
Almost done!
It's a little too close to the top of the canvas, it needs to slide down a bit. By experimentation, I found 18 pixels to be about the right amount.
Your image should look like this:
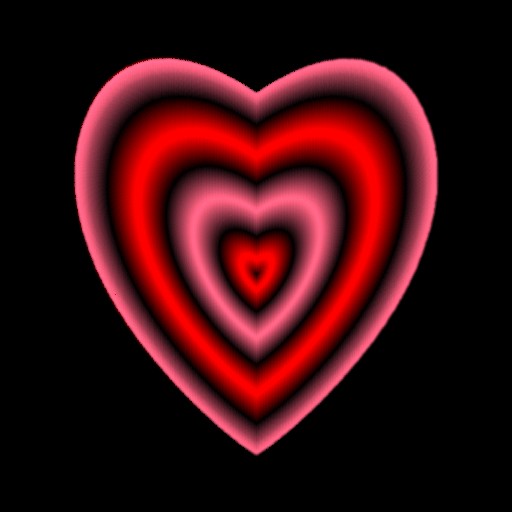
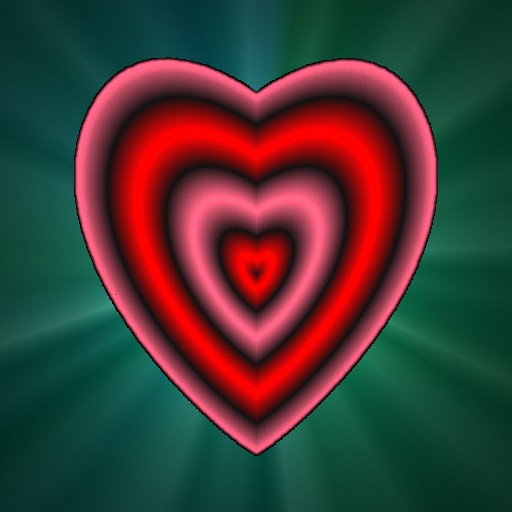
That's it for the basic how-to. This is the finished picture, but now I'll show you an additional effect I like.
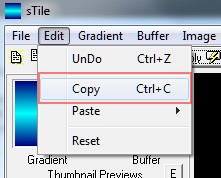
Copy the image to the ClipBoard, use the menu or the Ctrl+C key combination.
Apply the SuperNova effect. Change the Pen color to blue if you want to make it like mine, or use any other color you like. You can experiment with the SuperNova settings to see what they do.
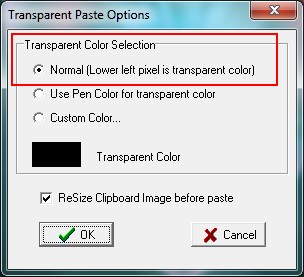
Now paste the image from the clipboard, using the Transparent option.
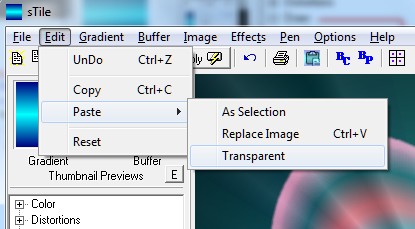
In the transparency dialog, make sure the Normal option is selected
This is the finished image
Copyright © 2016 HarmWare